Smarters Billing Solution XUI.ONE
Learn how to install, configure and automate Smarters Billing Solution for XUI.ONE using WHMCS. Full step-by-step tutorial with server setup, database configuration and automated IPTV provisioning.
⭐ Smarters Billing Solution XUI.ONE Complete Installation Guide
Smarters Billing Solution for XUI.ONE is a complete automation system designed for IPTV providers, resellers and service operators. It connects WHMCS with your XUI.ONE panel to deliver a fully automated billing and provisioning workflow.
It manages:
- User creation
- Subscription activation
- Suspension and unsuspension
- Automated expirations
- Invoice-based renewals
- API-driven provisioning
The system combines WHMCS with the XUI.ONE Billing Module, giving you a professional backend that runs your IPTV service automatically.
⭐ Core Features
✔️ Auto Create Service
When a client purchases a subscription, WHMCS automatically creates the IPTV line on your XUI.ONE server.
✔️ Auto Suspend / Unsuspend
If a client doesn’t pay the invoice, the system suspends the line. When paid, it reactivates automatically.
✔️ Auto Termination
Expired or unpaid lines are terminated automatically. Admin can also manage this manually.
✔️ Auto Renewal
Invoices are generated automatically before expiry. When paid, the date updates instantly in XUI.ONE.
✔️ Easy Installation
Upload → Activate addon → Configure module → Done.
✔️ Multi‑Server Support
You can connect multiple XUI.ONE servers inside WHMCS for scalable automated provisioning.
🛠️ Step 1: Download and Upload the Module
Download the billing module archive:
Upload the archive to your WHMCS root directory, for example:
/public_html/whmcs/
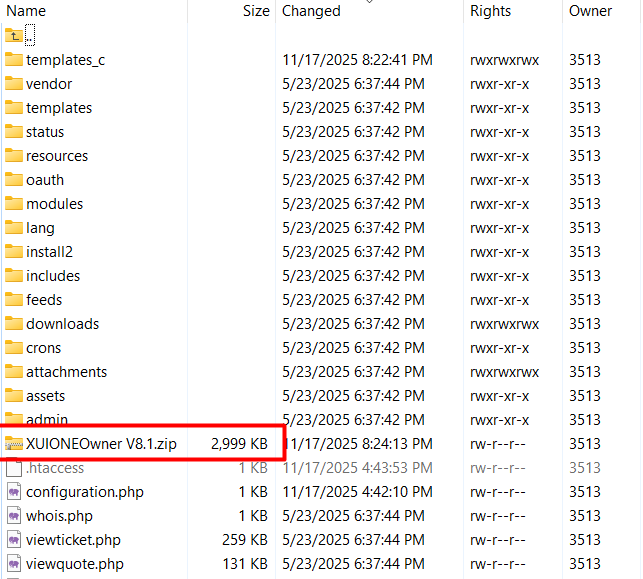
Extract the file. It will overwrite /modules and install the module automatically into the correct locations.

🧩 Step 2: Activate the Addon Module
Inside WHMCS go to:
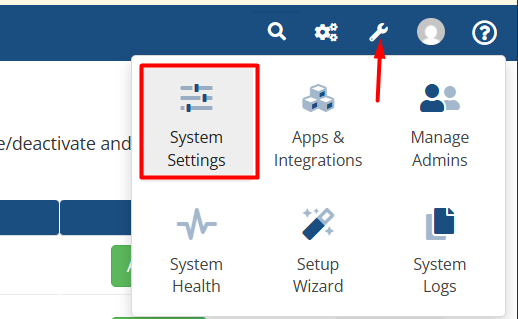
System Settings → Addon Modules
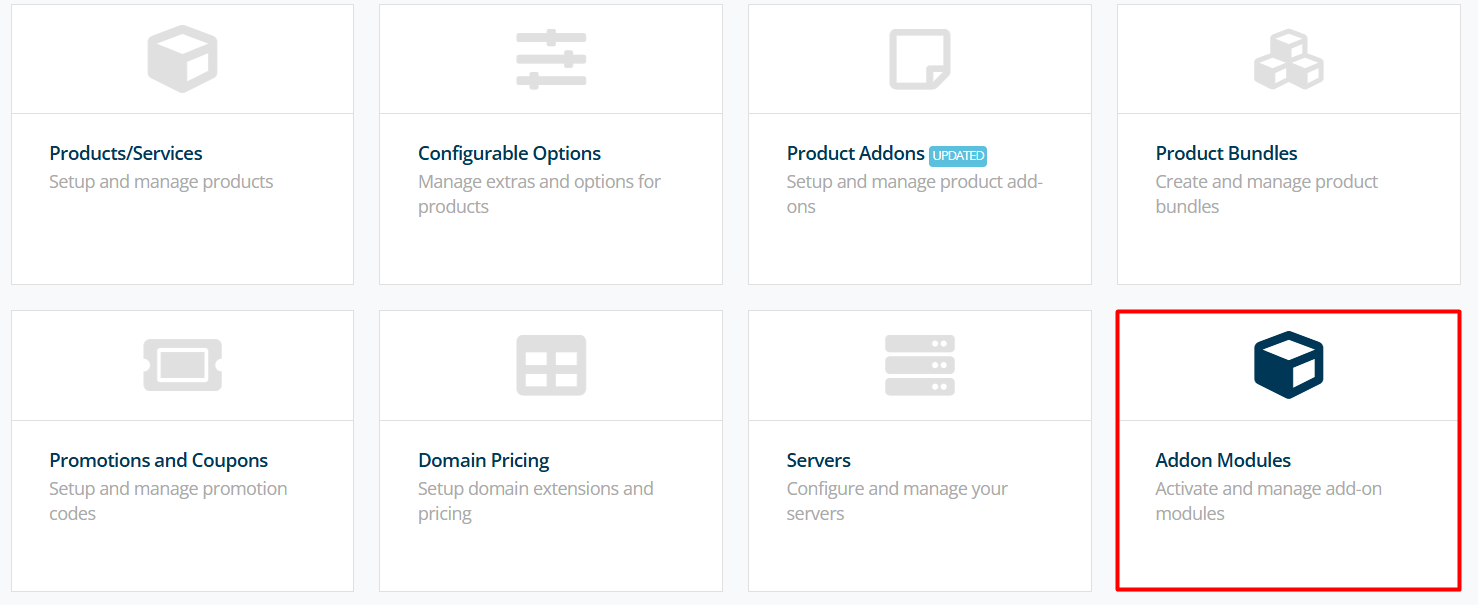
Scroll down until you find XUI One Dashboard.
Click Activate.
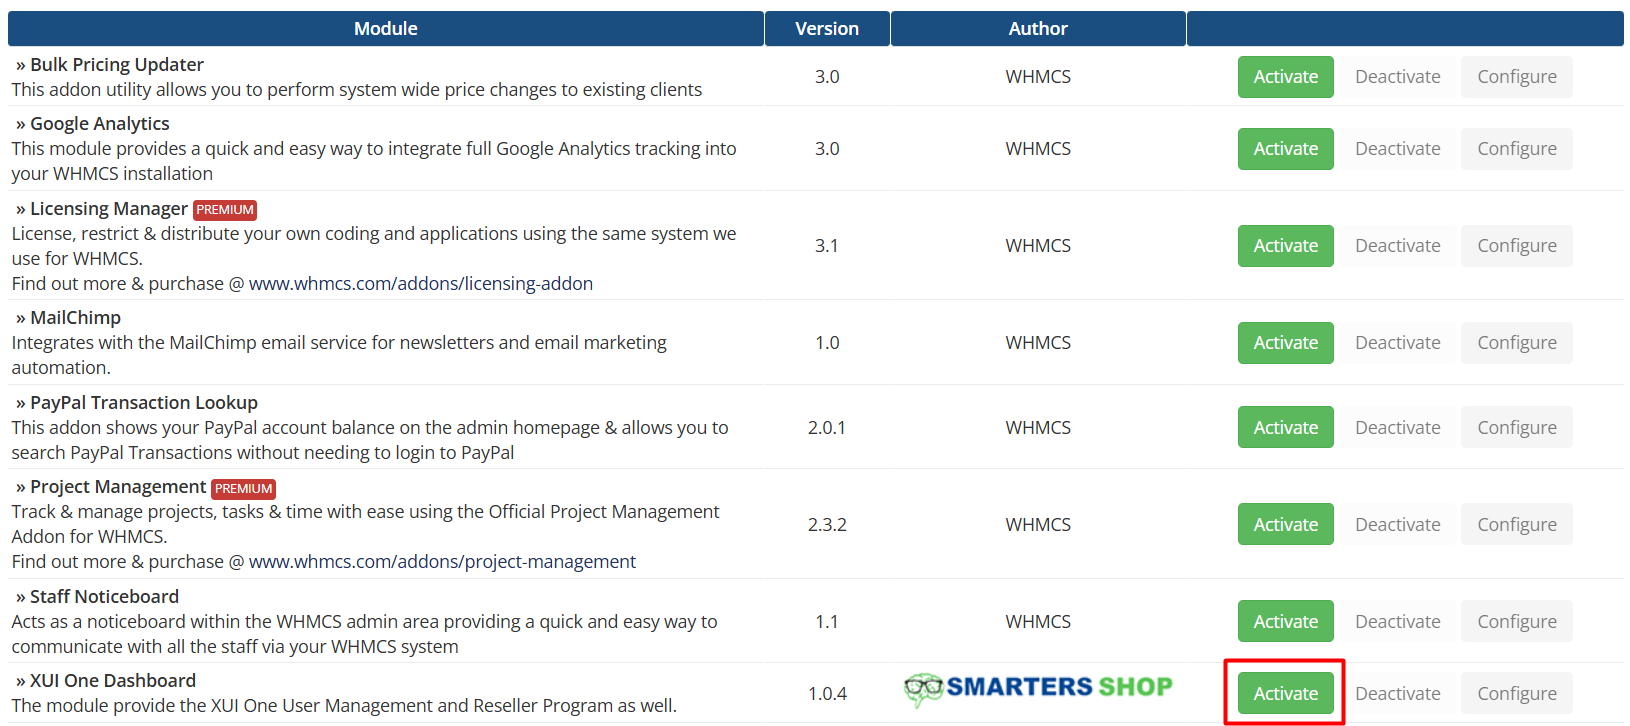
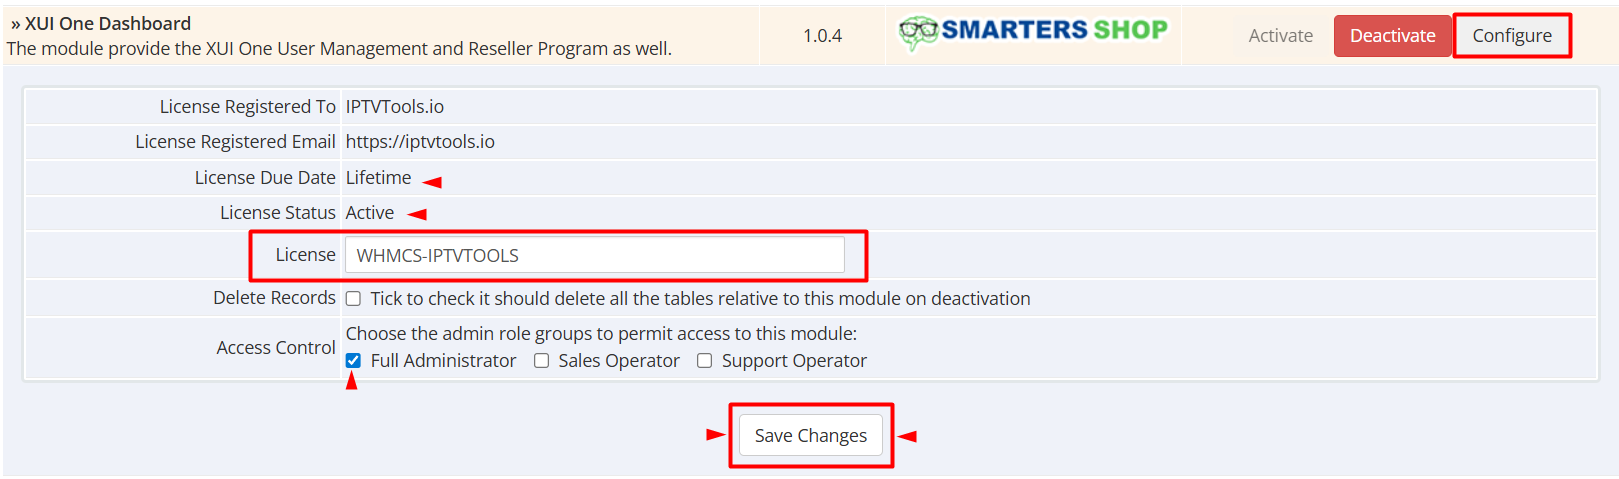
Now press Configure, then:

- Enter any License Key value
- Under Access Control select Full Administrator
- Click Save Changes
Your Billing Solution for XUI.ONE is now installed.
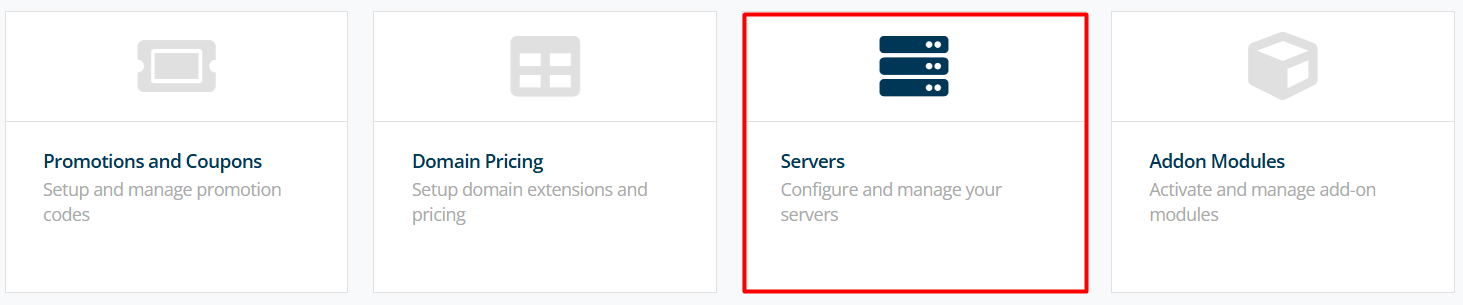
🌐 Step 3: Connect WHMCS to Your XUI.ONE Server
Go to:
System Settings → Servers → Add New Server
Click Go to Advanced Mode.

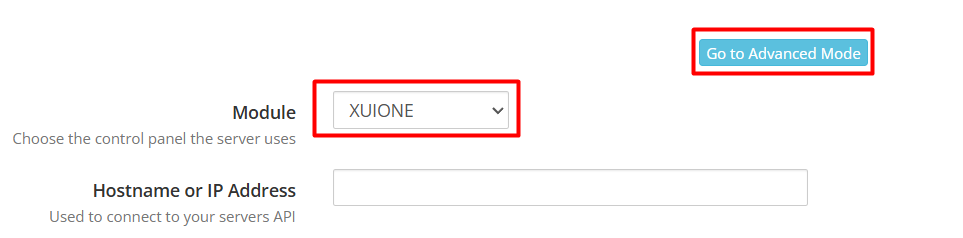
Fill the fields:
Name: XUI One Owner
Hostname: 192.168.1.10
IP Address: 192.168.1.10
Module Settings:
Module: XUIONE
Username: xuiclient
Password: 123456789
Access Hash: xui
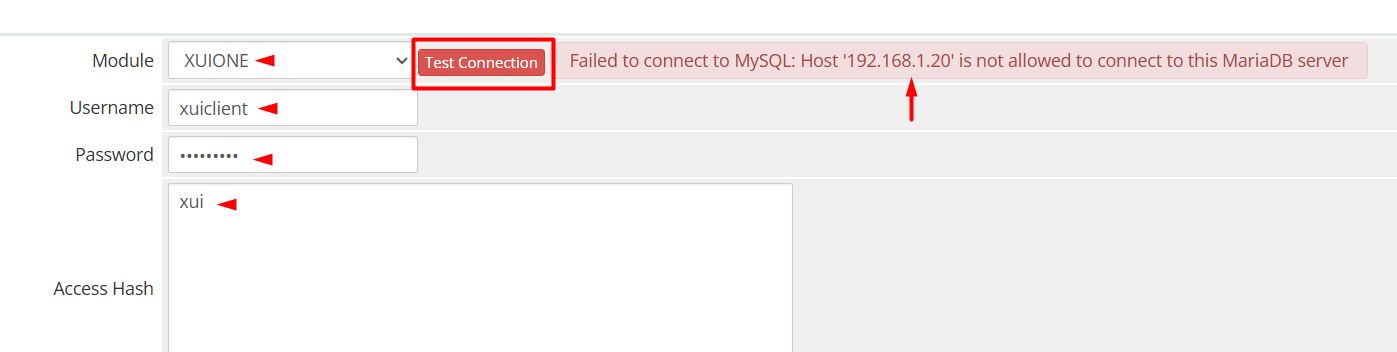
Click Test Connection.
You will receive an error because the MariaDB user is not created yet. This error reveals the WHMCS server IP that needs to be allowed.
🔐 Step 4: Create the MariaDB User on XUI.ONE Server
SSH into your XUI server and run:
mysql -u root -p
Then execute the SQL commands: