XUI 2.0 Load Balancer Setup
Learn how to install and configure XUI 2.0 Load Balancer on Ubuntu 24.04 for high performance IPTV streaming.
XUI 2.0 Load Balancer Setup – High Performance IPTV Streaming
⚡ XUI 2.0 Load Balancer Setup – High Performance IPTV Streaming
This guide explains how to install and configure a Load Balancer (LB) in XUI 2.0, designed for high performance IPTV streaming infrastructures.
🌐 What is a Load Balancer in XUI 2.0
A Load Balancer distributes IPTV traffic across multiple streaming servers. In the XUI.one ecosystem, the Load Balancer acts as a central traffic controller.
It ensures:
- Even traffic distribution
- Higher concurrent connections
- Improved stability
- Reduced load on the Main Server
- Better fault tolerance
For medium and large IPTV platforms, a Load Balancer is essential.
🧰 Server Requirements
Before installation, prepare a dedicated server for the Load Balancer.
Requirements:
- Operating System: Ubuntu 24.04 (mandatory)
- Fresh OS installation
- Root access enabled
- Firewall disabled during installation
- Server power equal to or stronger than the Main Server
Using a clean system guarantees a stable and predictable deployment.
🖥 Load Balancer Server Preparation
- Install Ubuntu 24.04
- Log in as root
- Disable firewall temporarily
ufw disable
Do not install any additional software on this server.
⚙️ Load Balancer Installation from XUI 2.0 Panel
Step 1. Open XUI 2.0 Admin Panel
Log in to your XUI 2.0 Dashboard.
Step 2. Navigate to Load Balancer Installer
From the main menu, go to:
Servers → Install Load Balancer

Step 3. Fill in Server Details
In the installation form, enter the Load Balancer server details:
- Server Name: any name you prefer
- Server IP: IP address of the Load Balancer server
- User:
root(mandatory) - Password: root password of the server
Double check all fields before continuing.
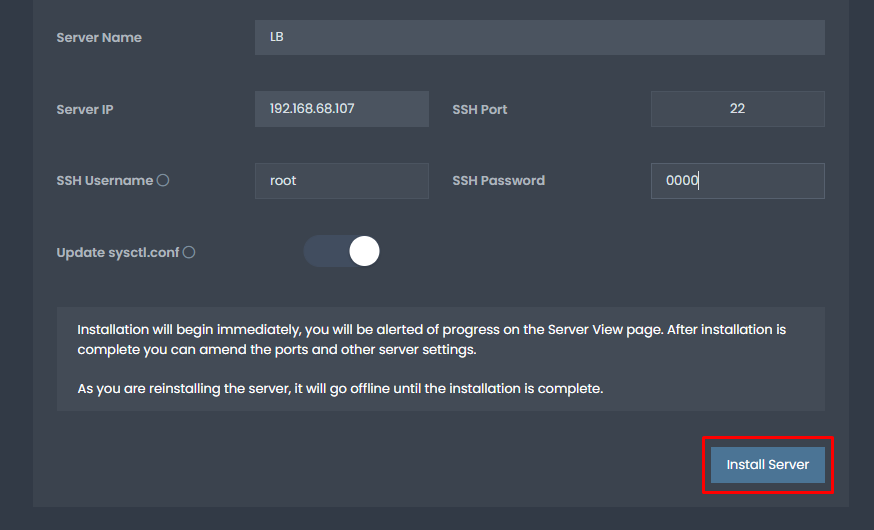
Step 4. Start Installation
Click Install Server.
The installation process will start automatically.
On the next screen, you will see:
- Installation progress
- Packages being installed
- Configuration steps in real time
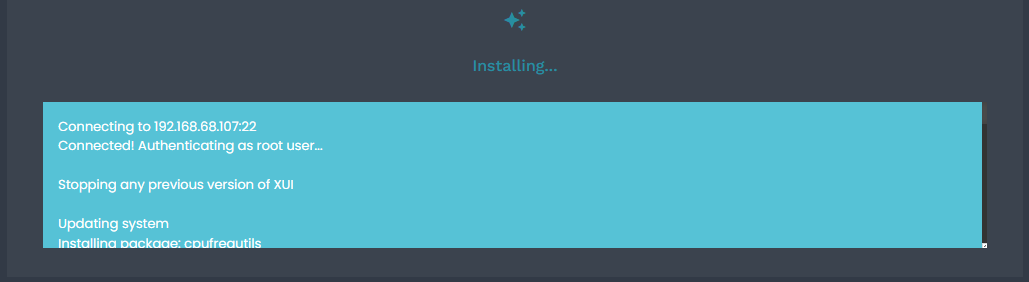
The process usually takes 2 to 5 minutes.
⏳ Finalization and First Connection
After installation completes, wait a few moments while the system establishes the first connection and ping.

For best results, it is recommended to restart the Load Balancer server.
reboot
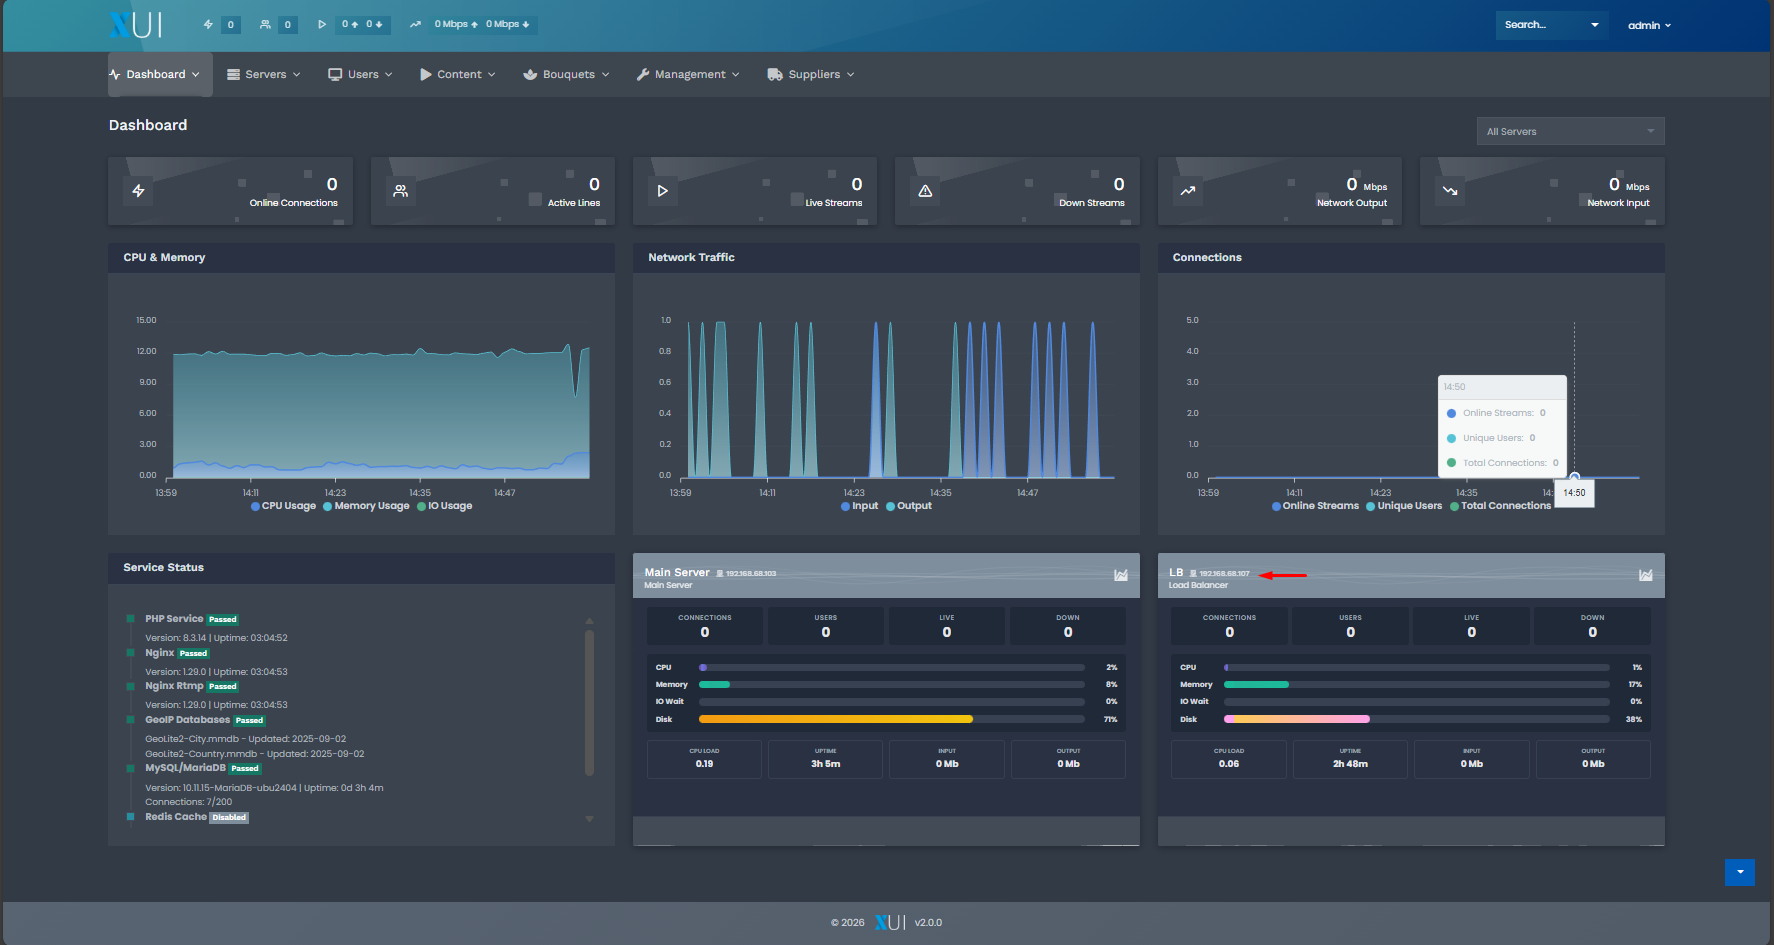
✅ Verify Load Balancer Status
After reboot, return to:
Servers → Manage Servers

You should see the Load Balancer:
- Status: Online
- Ping: active
- Resource usage: visible
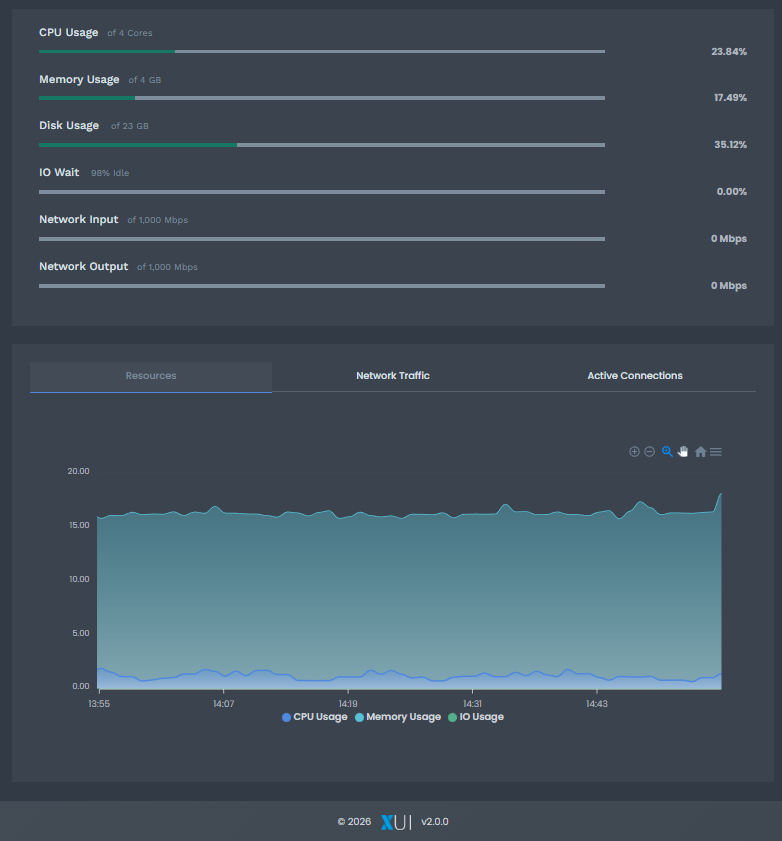
This confirms the Load Balancer is fully operational.
🚀 Your IPTV Network Is Ready
You now have a high performance IPTV infrastructure powered by XUI 2.0 Load Balancer.
Your system is ready to handle more users, more streams, and higher traffic with improved stability.