XUI 2.0 Database Restore
XUI 2.0 database restore, XUI migration tool, XUI 1.5.13 to XUI 2.0, IPTV panel migration, XUI restore database, IPTVTOOLS.IO XUI
XUI 2.0 Database Restore, Upgrade from XUI 1.5.13 Step by Step
🔄 XUI 2.0 Database Restore and Migration Guide
This guide explains how to safely restore and migrate a XUI 1.5.13 database to the new XUI 2.0 Streaming Panel.
Although both versions use MySQL/MariaDB, XUI 2.0 introduces structural changes in several database tables. Because of this, a direct mysql restore from the command line is not safe and is not recommended.
To solve this, IPTVTOOLS.IO developed a dedicated migration tool, fully integrated into XUI 2.0. No external scripts are required. All steps are handled automatically and correctly.
⚠️ Important Notes Before You Start
- This procedure is designed specifically for XUI 1.5.13 → XUI 2.0
- Direct database import via
mysqlis unsafe - Always use the built-in XUI 2.0 migration tools
- You must have a valid XUI 1.5.13 database backup (.sql)
🛠 Built-in XUI 2.0 Tools Overview
Open a terminal with root privileges and run:
/home/xui/tools
Available actions:
Actions
----------------------------------------------------------------
rescue                  Create a rescue access code for the admin panel.
user                    Create a rescue admin user for the admin panel.
mysql                   Reauthorise load balancers on MySQL.
database                Restore blank XUI database.
restore <file>          Restore backup. Ex: restore /home/xui/backups/backup.sql
migration               Clear migration database.
flush                   Flush blocked IP database.
ports                   Regenerate ports from SQL table.
access                  Regenerate access codes from SQL table.
For database migration, only a few of these commands are required.
🧩 Step-by-Step Database Restore Process
Follow these steps in the exact order.
1️⃣ Restore a Clean XUI 2.0 Database
First, restore the blank XUI 2.0 database schema. This creates a clean and compatible working environment.
/home/xui/tools database
This step is mandatory.
2️⃣ Restore the XUI 1.5.13 Backup
Now restore your existing XUI 1.5.13 database backup using the integrated restore tool.
/home/xui/tools restore /path/to/your/backup.sql
Replace the path with the real location of your backup file.
The tool automatically adapts the data to the XUI 2.0 structure.
3️⃣ Generate a Rescue Access Code
Create a new rescue access code for the admin panel.
/home/xui/tools rescue
This code allows secure access after migration.
4️⃣ Create a Rescue Admin User
Create a new admin user and password for XUI 2.0.
/home/xui/tools user
Use these credentials to log in to the admin panel.
🔐 Login to XUI 2.0 Admin Panel
Log in using the newly generated credentials.
After login, you will see:
- All users restored
- All streams restored
- All settings migrated
🖥 Update Main Server IP Address
This step is required.
- Go to Servers → Manage Servers
- Select Main Server
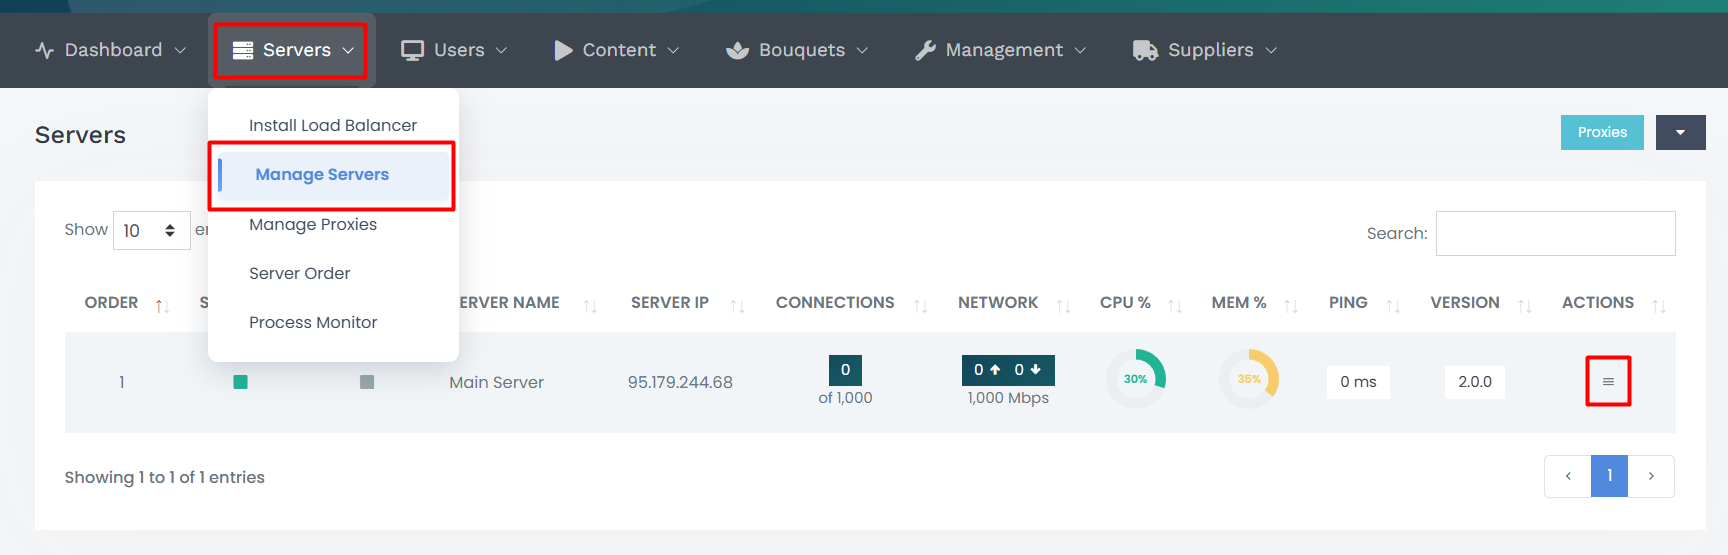
- Click Edit Server
- Update Server IP with your current server IP

- Save changes
🔄 Final Database Sync
Run the following command to finalize the migration and sync the database:
/home/xui/status
This command updates internal references and prepares the system for production use.
♻️ Optional: Restart the Server
For a full initialization, you may restart the server:
reboot
✅ Migration Completed
Your XUI 1.5.13 database is now fully restored and migrated to XUI 2.0.
The process is safe, automated, and optimized for the new XUI 2.0 architecture.