How to Add a Live Channel
Step by step guide on how to add and configure a live TV stream in XUI 2.0 IPTV Panel quickly and correctly.
📺 How to Add a Live Channel in XUI 2.0 IPTV Panel
This complete guide explains how to add and configure a Live TV Stream inside the XUI 2.0 IPTV Panel.
Before starting, make sure XUI 2.0 is properly installed and activated. If not, follow the official installation guide:
🚀 Overview
Adding a live stream in XUI 2.0 requires four main steps:
- Create a Bouquet
- Create a Category
- Add the Stream
- Assign the Stream to a Server
Follow the steps below carefully.
🎯 Step 1 – Create a Bouquet
From the Dashboard, navigate to:
Bouquets → Add Bouquet
- Enter your desired Bouquet Name
- Click Add
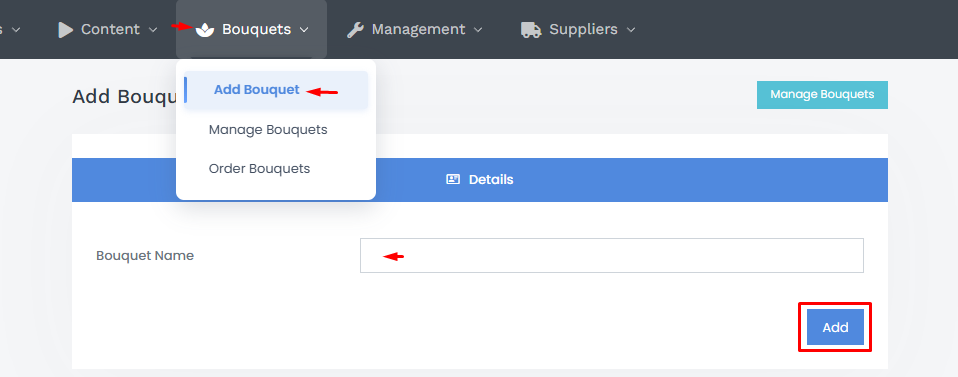
Bouquets are used to group channels and assign them to users or subscription packages.
🗂 Step 2 – Create a Category
Go to:
Management → Service Setup → Categories
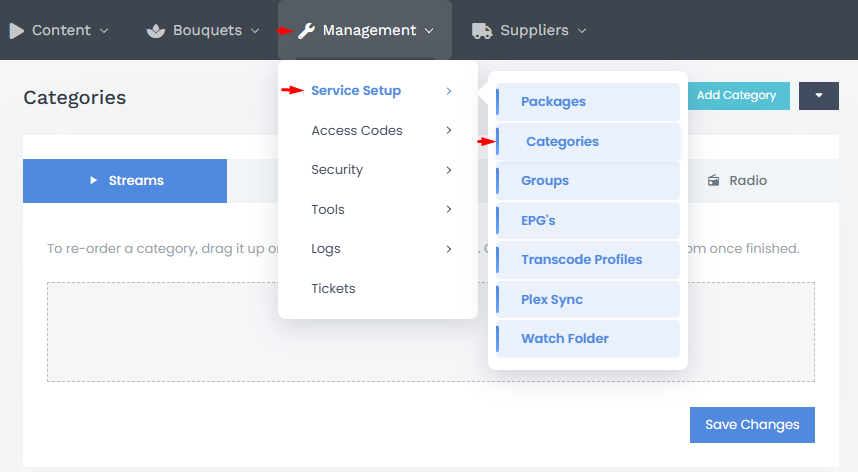
- Click Add Category
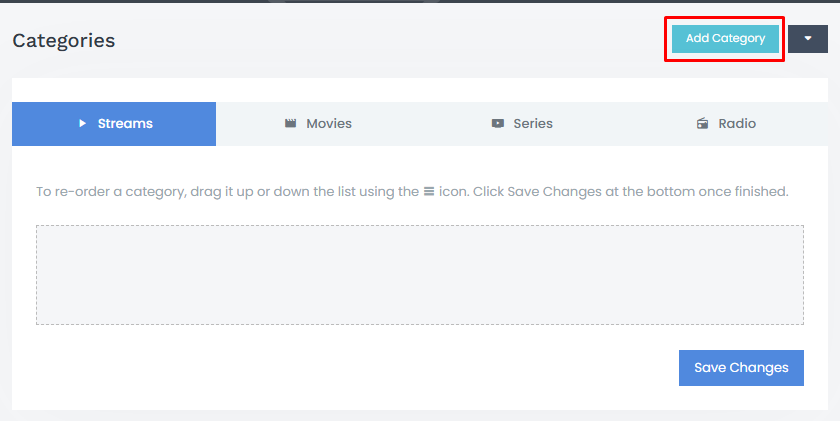
- Enter a Category Name
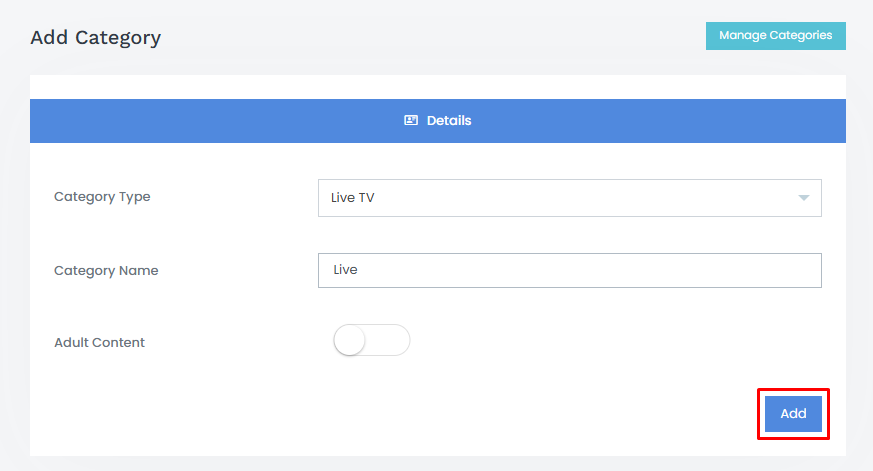
- Click Add
Categories help organize your live channels inside the system.
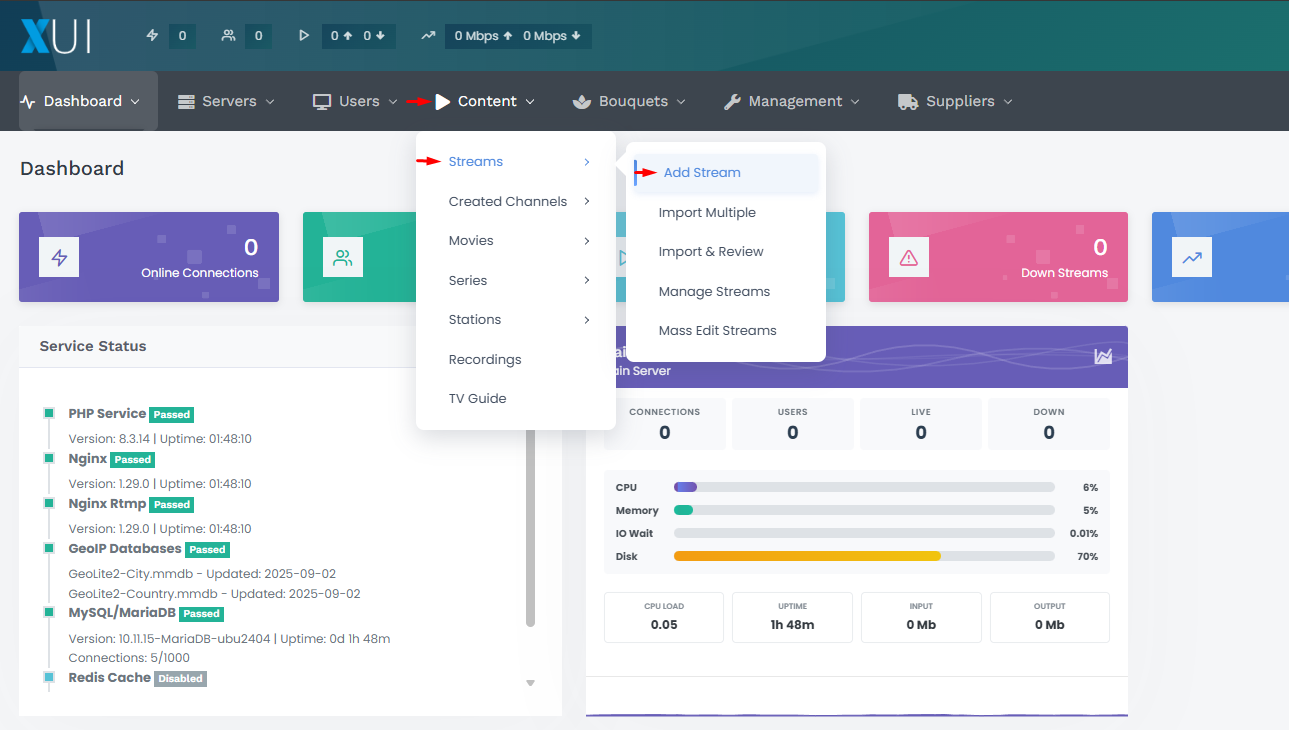
🎬 Step 3 – Add the Live Stream
Navigate to:
Content → Streams → Add Stream
Fill in the required fields:
- Stream Name
- Stream Logo
- Select the correct Category
- Choose Live as stream type
- Assign the correct Bouquet
- Select Local if required
- Add optional Notes
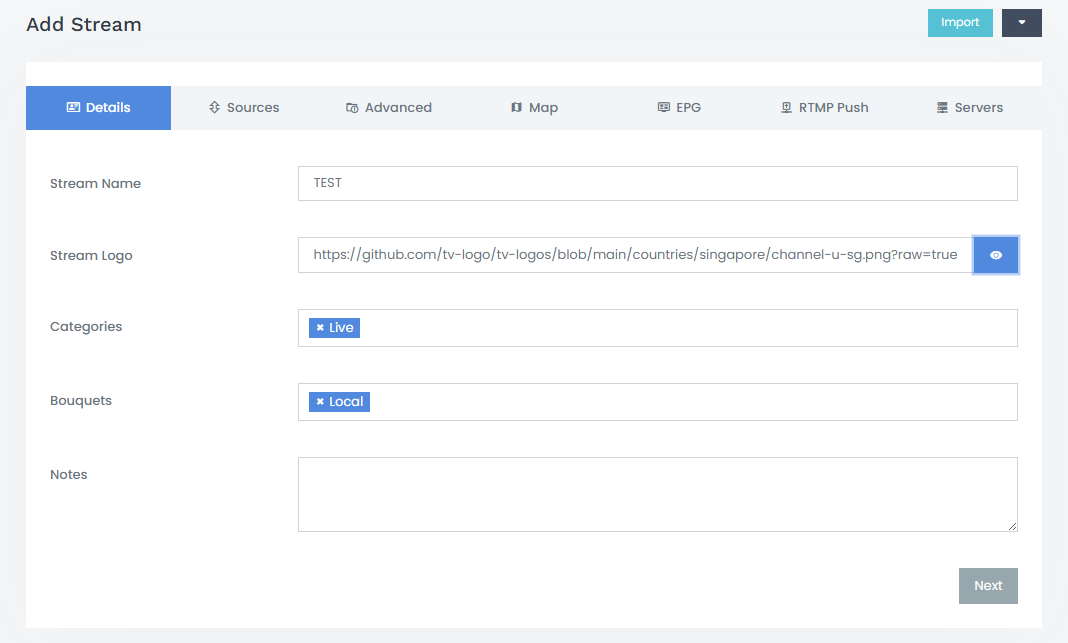
Click Next.
🔗 Step 4 – Add the Source URL
Enter the Live Stream Source URL.

Click Next.
Continue through the configuration pages.
You may configure additional options such as:

- Transcoding
- Monitoring
- Advanced settings
Select options according to your needs.
Proceed until you reach the final step.
🖥 Step 5 – Assign Stream to Server
In the final section under Servers → Server Tree:
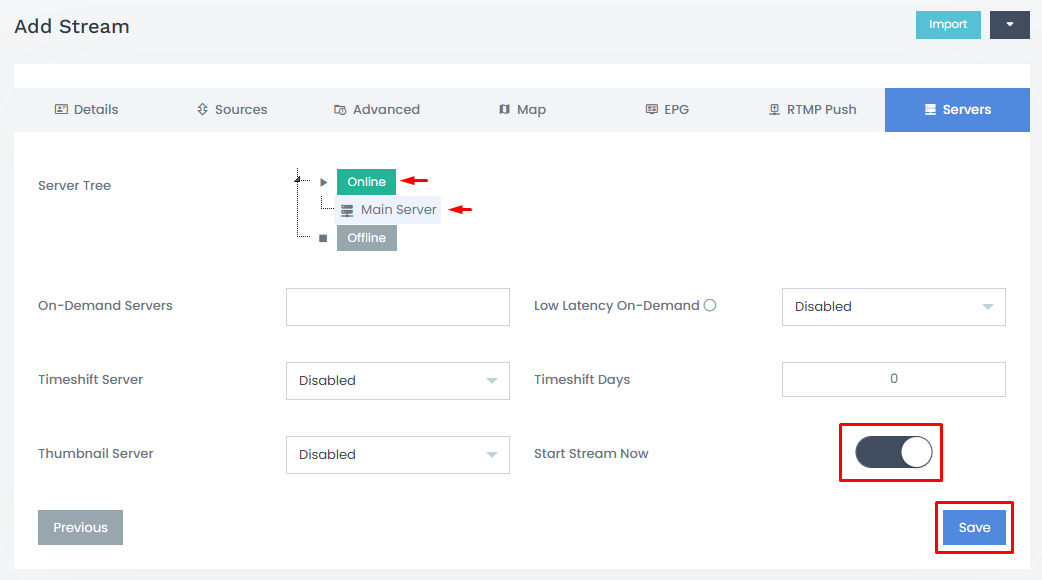
- Click on Main Server
- Check Start Stream Now
- Click Save
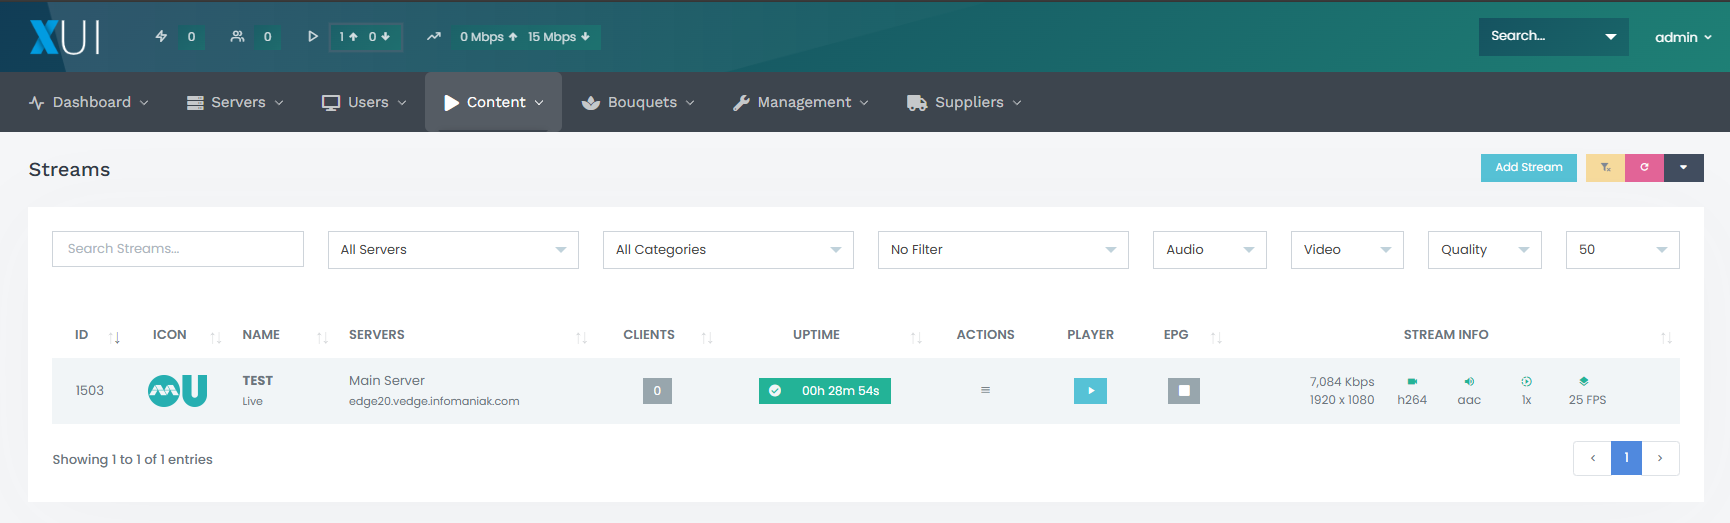
⏳ Stream Initialization Process
After saving, the stream status will display:
STARTING
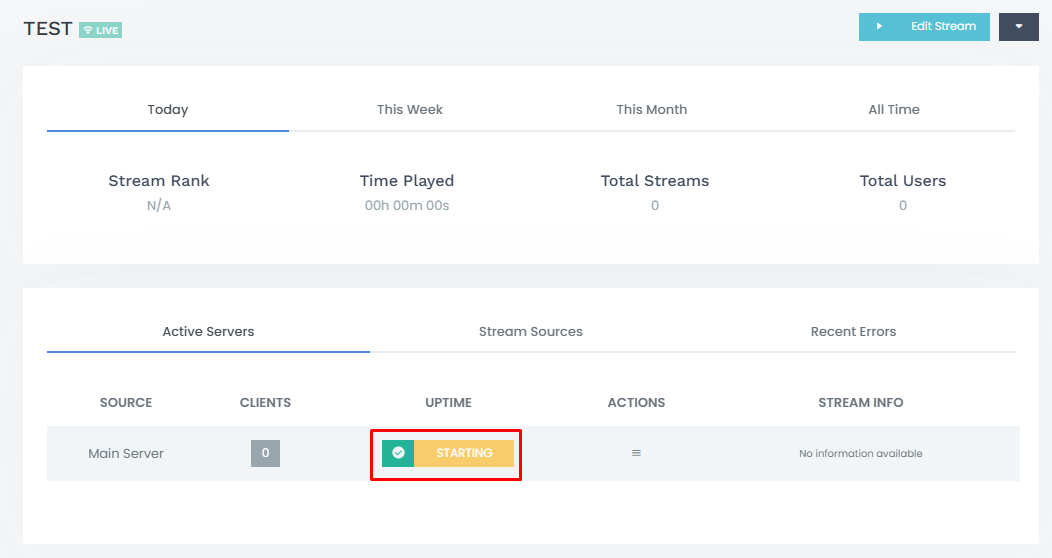
This process may take a few seconds depending on:
- Source stability
- Server performance
- Network speed
After initialization, the page refreshes automatically.
You will see:
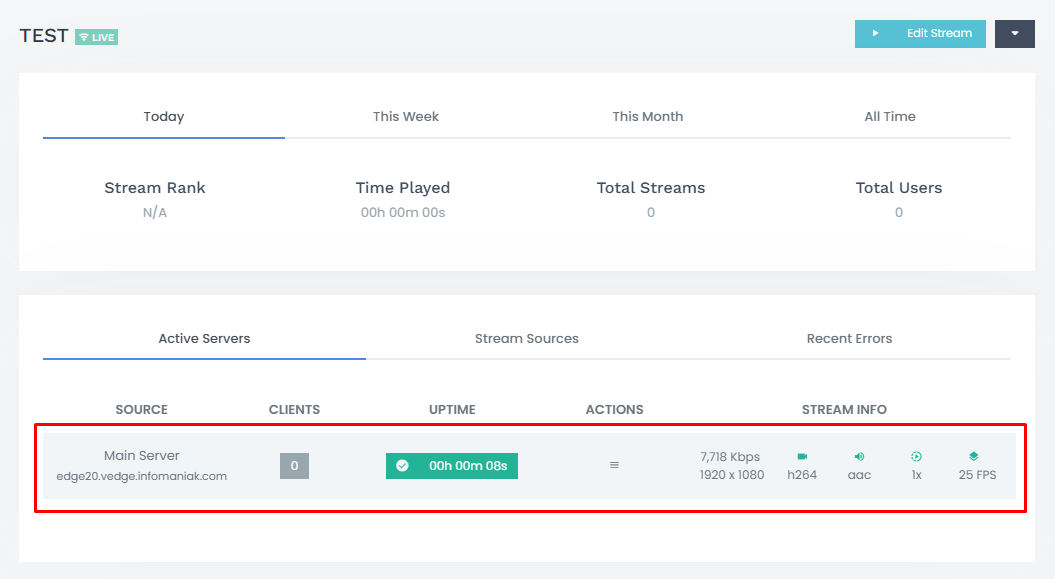
- Stream status updated
- Uptime
- Technical Stream Information
▶️ Preview the Live Stream
Click the Play button to test the stream directly inside the panel.
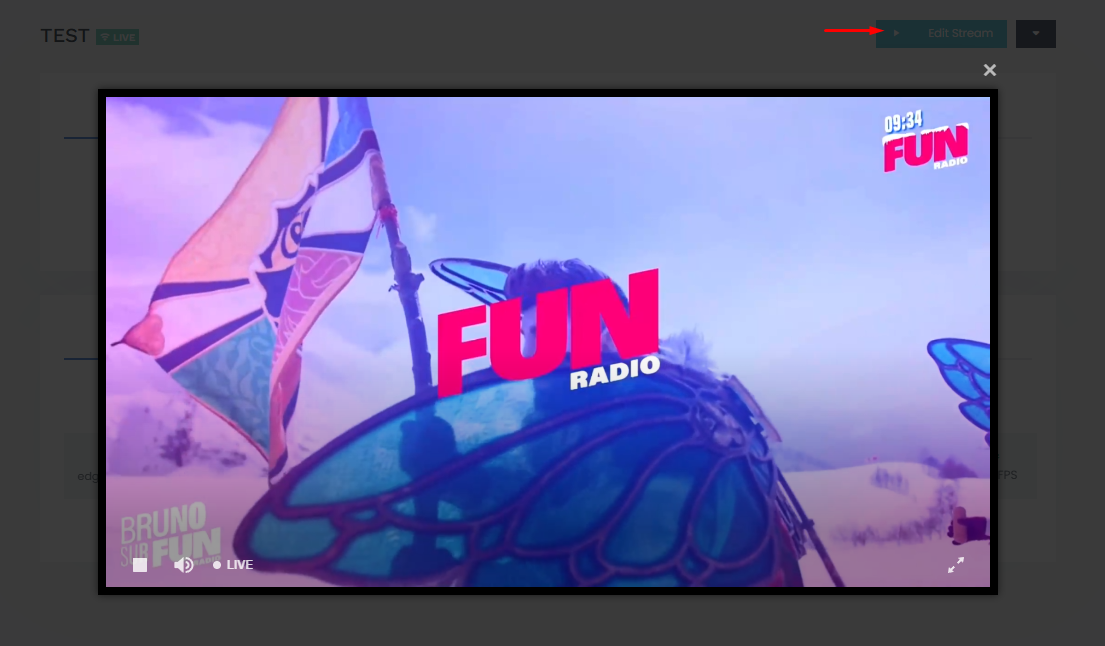
If configured correctly, the stream will begin playback immediately.
✅ Live Channel Successfully Added
Your live channel is now active in XUI 2.0 and ready to be assigned to users.
You can now scale, manage, and monitor the stream directly from the panel.